Last Updated: October 28, 2026
Quick Summary
Protect exterior window seals from Palouse winter frost by inspecting the caulk line on a dry fall afternoon for gaps, cracks, and peeling, then cleaning the joints and applying a sealant whose label temperature range and cure time fit the forecast. Cold slows cure, so test one sheltered joint first and leave the bead alone for the full cure time.
- Walk the outside of your home before the first hard freeze and check caulk at the bottom and sides of each frame.
- Many exterior sealants want the surface above roughly 40°F, so read the tube’s application range and cure time.
- Silicone suits glass-to-frame joints; polyurethane suits frame-to-siding joints that need paint.
- Push the tube along the joint rather than pulling, and tool the bead so it sheds water.
- Plastic window film, thermal curtains, rope caulk, and draft stoppers are temporary fixes until spring.
Table of Contents
- Why Palouse Freeze-Thaw Is Hard on Window Seals
- How to Check Window Seals for Damage Before the Cold Sets In
- Signs of Failed Window Seals You Should Not Ignore
- How to Clean Exterior Window Seals Without Making Things Worse
- Choosing the Right Sealant for Cold-Weather Application
- Step-by-Step: Sealing Gaps, Cracks, and Joints Around Window Frames
- Temporary Fixes That Buy You Time Until Spring
- When to Call Me And My Truck for Window Cleaning Help
- Frequently Asked Questions
Why Palouse Freeze-Thaw Is Hard on Window Seals
Palouse winters don’t just get cold. They thaw, refreeze, and do it again, sometimes in the same week.
Daytime sun warms the glass and frame. Overnight it drops below freezing. Repeated temperature changes can put stress on the caulk and the surrounding joints.
Add our local grit. Loess dust, cottonwood fuzz, and canyon fog are familiar parts of the Palouse environment. Why local window cleaners know Palouse dust, cottonwood fuzz, and canyon fog explains what to look for.
This guide from Me And My Truck covers how to protect exterior window seals from Palouse winter frost.
How to Check Window Seals for Damage Before the Cold Sets In
A dry afternoon in late fall, before the first hard freeze, is a practical time to check window seals.
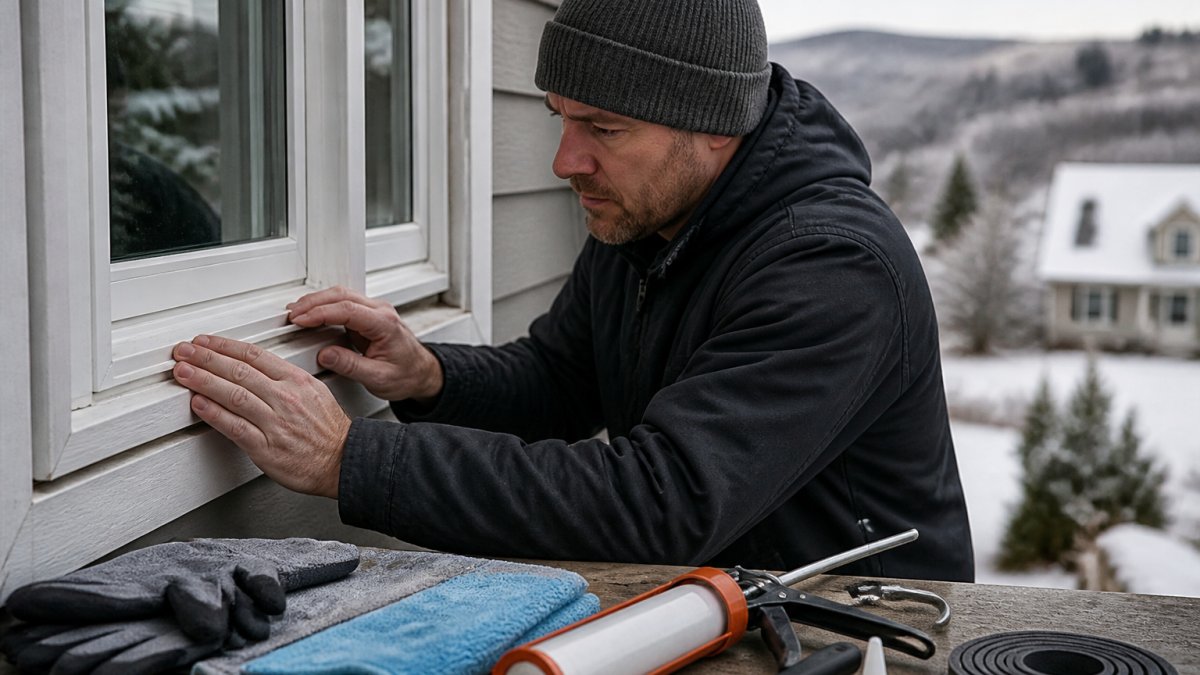
Look along the caulk line at the bottom and sides of each frame for gaps, soft spots, and places where the sealant has pulled away. Then look for:
- Cracks or splits in the caulk
- Gaps between the sealant and the frame or siding
- Caulk that peels off in strips when you press it
- Dark stains or bubbling in the sealant
Check the weatherstripping too. Open and close each window once. If it closes sloppily or you see daylight around the sash, note the issue.
One thing to know: moisture between the panes can indicate a problem inside the glass unit.
Signs of Failed Window Seals You Should Not Ignore
Watch for these signs of failed window seals:
- A cold draft near the frame on a windy day
- Frost on the inside of the glass near the edges
- Water staining on the sill or trim below the window
- Daylight visible around the frame
Frost on the inside edge of the glass can be a sign of a draft.
Water staining on the sill or trim is worth noting. If you find it, have the area checked.
If you find a seal that has clearly failed, or a glass unit with fog between the panes, that’s a job for a glass or repair company.
How to Clean Exterior Window Seals Without Making Things Worse
Cleaning can remove dirt and grit from around the caulk line before you inspect it.
Here’s how to clean exterior window seals safely:
- Pick a mild day above freezing.
- Brush out loose dirt with a soft brush. A dry paintbrush works well along the caulk line.
- Wash the frame and seal with warm water and a little dish soap.
- Use a soft cloth or sponge. Skip abrasive pads.
- Rinse with clean water and let everything dry fully.
- Wipe out the window tracks with a damp cloth. A quick wipe is enough.
Use gentle pressure when cleaning around the caulk line. For Palouse-specific steps on glass, screens, and frames, see Window Cleaning Tips for the Palouse. Avoid spraying water into a gap you already know is open. Clean around it and let the area dry.
Choosing the Right Sealant for Cold-Weather Application
This is where most winter seal jobs quietly fail. Not a bad brand, but a good product applied outside the temperature window printed on the tube. Palouse afternoons in late fall can swing from mild to below freezing in a few hours, so the label matters.
Read the tube like it’s the instructions
- Application temperature range. The air and surface temperature the sealant needs while you work. Many exterior sealants want the surface above roughly 40°F. Some cold-weather formulations advertise lower. If the tube says not to apply below a certain temperature, believe it.
- Cure time. How long the bead needs before it’s rained on, painted, or washed. Cold slows cure. A bead that skins over in a few hours in July may take a day or more in November.
- Surface requirements. Most exterior sealants want a clean, dry surface. Some want it dry and above a minimum temperature. A few tolerate a slightly damp surface. Read that line twice.
Match the sealant to the joint
| Sealant Type | Best For | Cold-Weather Notes |
|---|---|---|
| Silicone | Glass-to-frame joints | Stays flexible through freeze-thaw; check the label for its cold-application range |
| Polyurethane | Frame-to-siding joints | Tough and paintable; wants a dry surface and a cure window that isn’t freezing |
| Acrylic latex | Indoor use or mild-weather exterior touch-ups | Easy to tool, but less flexible when the frame moves in a hard freeze |
| Butyl rope caulk | Temporary gap filling | Removable in spring; not a permanent exterior seal |
Silicone is the usual pick for the glass-to-frame joint because it stays flexible. Polyurethane is the usual pick where the frame meets siding, because it’s tough and you can paint it. Acrylic latex has its place, but a Palouse freeze-thaw cycle is hard on a rigid bead.
Test before you commit
Before you run a full bead along every window, do one joint. Pick a window on a sheltered side, clean and dry the joint, and lay a short bead. Let it cure for the full time on the label, then press it with your thumb. If it’s still tacky or peels away with light pressure, the conditions were wrong, too cold, too damp, or the surface wasn’t clean.
What to skip
Don’t buy a sealant just because it says “winter” on the front. Flip the tube over and read the temperature range and cure time. If those two lines don’t fit the forecast for the next couple of days, put it back. And don’t mix sealant types in the same joint, a silicone bead over an old acrylic bead won’t bond right.
Step-by-Step: Sealing Gaps, Cracks, and Joints Around Window Frames
Once the frame is clean and dry and you’ve picked a sealant whose label fits the forecast, you can seal gaps, cracks, and joints. Work on a dry day when the temperature is inside the sealant’s range, and plan to leave the bead alone for the full cure time.
1. Remove the old sealant carefully
- Don’t gouge the frame. A metal tool dragged hard along a wood or vinyl frame leaves a groove that the new sealant can’t fill.
- Don’t chase every speck. You want the loose, failed sealant gone. Sealant that’s still firmly bonded to the frame can stay.
- Watch the glass edge. Keep the scraper flat against the frame, not angled into the glass.
If the old sealant is silicone and won’t let go, a silicone remover helps soften it. Follow the directions on the bottle and give it time to work. Forcing it off is how frames get scratched.
2. Clean the joint
Brush out dust and grit with a dry paintbrush or soft cloth. Loess dust packs into joints and keeps the new bead from bonding. Wipe the joint with a dry cloth right before you apply. If you used a silicone remover, make sure the residue is gone and the surface is dry.
3. Judge the gap
Small cracks get a bead of caulk. Wide gaps, wider than a pencil, may need a foam backer rod first so the sealant has something to sit against instead of sagging into the void. Press it in slightly below the surface, then caulk over it. A bead too thick for the gap will slump and pull away as it cures.
4. Cut the nozzle
Cut at a slight angle and keep the opening small. A small bead is easier to control, tools more cleanly, and cures more evenly than a fat one. You can always add a second pass; you can’t easily take one back.
5. Apply the bead
Push the tube along the joint at a steady pace. Push, don’t pull, so the sealant presses into the gap instead of riding over it. Keep the nozzle tip in contact with the surface and the bead consistent. Stop and restart cleanly at corners rather than dragging around them.
6. Tool the bead
Run a damp finger or caulk tool along the bead to smooth it and press it into the joint. Wipe the tool between passes so you’re not dragging old sealant onto the fresh bead. A well-tooled bead has a slight concave curve that sheds water instead of pooling it.
7. Let it cure
Leave it alone for the full cure time on the label. Don’t paint, wash, or press on it early. Cold slows cure, so a bead applied on a cool afternoon may need longer than the label’s mild-weather number. If rain is coming before the cure time is up, wait for a better window.
Weatherstripping, briefly
For weatherstripping, peel off the old strip, clean the channel, and press on the new strip. Rubber, vinyl, and silicone weatherstripping all work. Match the thickness to the gap so the window closes snug without forcing the sash.
When to stop and call for repair
If you notice a cracked pane, fog between the panes, or a seal that appears to have failed inside the glass unit, have a glass or repair company take a look. We point out problems like that when we clean windows, but we don’t repair or re-caulk seals.
Temporary Fixes That Buy You Time Until Spring
Sometimes the cold arrives before you’re ready. These temporary measures may help you get through the season.
- Plastic window film: Double-sided tape plus shrink film on the inside of the frame. A hair dryer tightens it. It’s the fastest way to cut drafts.
- Thermal curtains: Heavy curtains drawn at night keep cold air away from the glass.
- Rope caulk: A removable putty that presses into gaps. It peels out in spring.
- Draft stoppers: A rolled towel or foam strip along the sill blocks air sneaking under the sash.
- Window locks and latches: Make sure they pull the sash tight. A loose latch lets cold air in.
When to Call Me And My Truck for Window Cleaning Help
Some of this work you can do yourself. Cleaning and looking over the windows are fair game for a handy homeowner.
If you’d rather not clean the windows yourself, Me And My Truck has cleaned windows around Moscow and Pullman since 1987.
You can read more about our window cleaning service in Moscow and Pullman. When you’re ready, get a free quote.
Frequently Asked Questions
Should I seal my windows for winter?
A fall check can help you note visible issues before winter. If you are not comfortable on a ladder, Me And My Truck can clean the exterior windows and point out seal problems.
What are the signs of failed window seals?
Look for cracked or peeling caulk, gaps between the frame and siding, visible daylight around the edges, condensation between panes, or frost forming on the inside glass. Water stains or soft wood near the sill are also worth noting. If you notice these signs, have a glass or repair company take a look. Me And My Truck does not repair or re-caulk seals, but we can point out problems during a window cleaning visit.
Can I caulk exterior windows in cold weather?
Read the product label for its application instructions. If you notice a problem with a window seal, have a glass or repair company take a look.
How do I clean around window seals without damaging them?
Use a soft brush or cloth and mild soapy water. Rinse gently and let everything dry fully before you inspect the area. If the seals are already cracking or pulling away, cleaning will not fix that. Me And My Truck handles exterior window cleaning from ladders and lifts, and we will point out seal issues we spot.
Palouse freeze-thaw is hard on window seals, but a little prep in late fall goes a long way. If you’d rather hand off the window cleaning and let us flag any seal problems we see, we’re happy to help. Call or text (208) 882-5641 or send a photo for a free quote.